How to Work With Fungi
3/30/202012 min read
In this article I’m going to share ways to start growing mushrooms at home and how to use them to improve the soil in your garden or landscape. Enjoy!
Where Do I start?
If you are just starting to peek into the realm of mycology and mushroom cultivation, you’ve probably wondered where to actually start. Luckily for us, we live in the information age and everything you need to get started is at your finger tips. The only thing left is for you to create your own experience.
Setting up the right environment
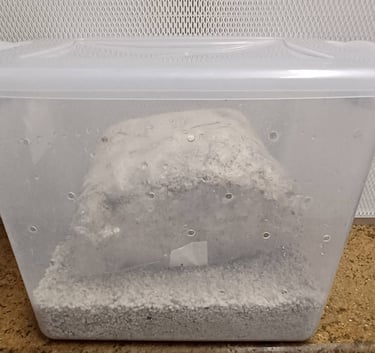
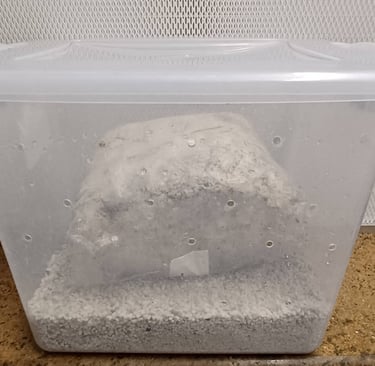
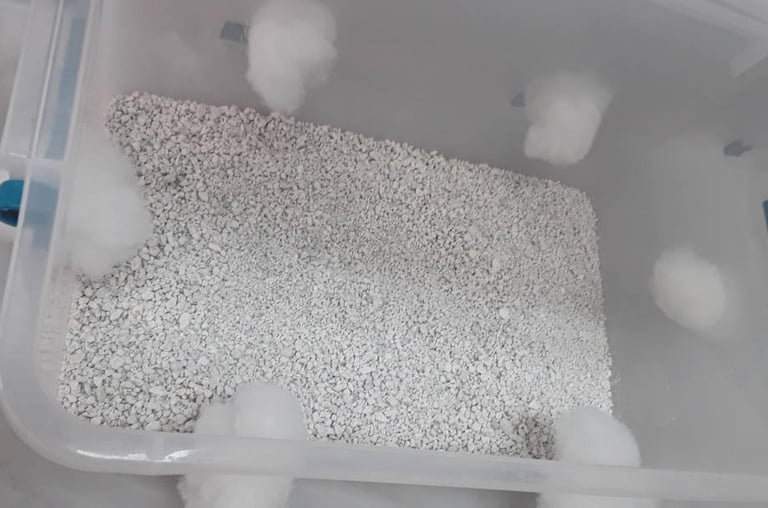
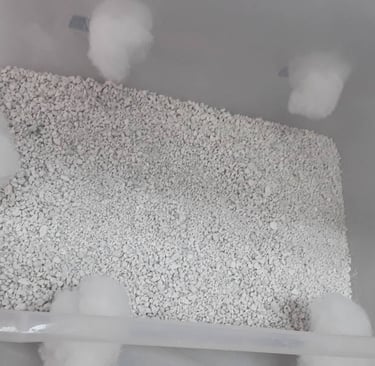
This is called a shotgun fruiting chamber. A transparent plastic bin with multiple holes drilled into it, with saturated perlite at the bottom. You can thank the underground growing community for providing these clever innovations. It is a cost effective way to control the environmental conditions for your kit to produce mushrooms.
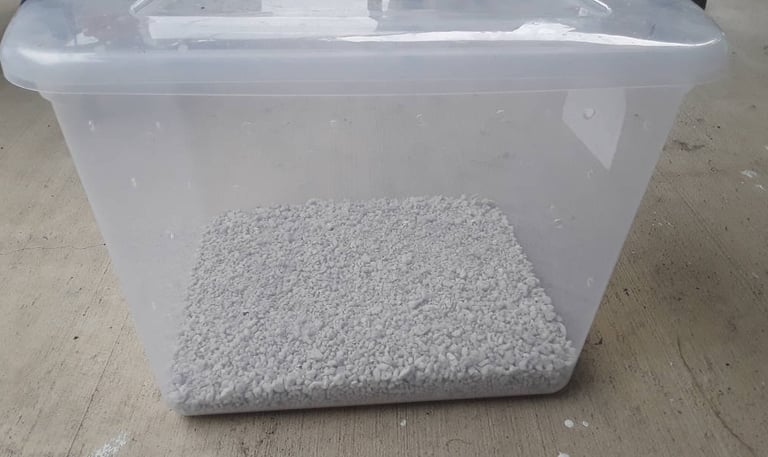
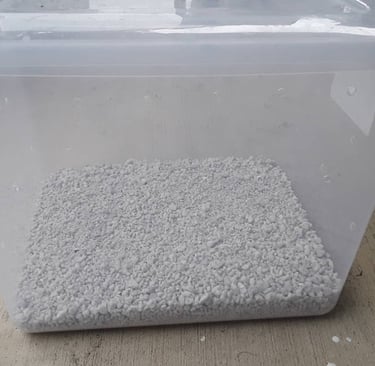
This fruiting container is ideal if you are limited on space and don’t have the resources to build a large scale fruiting environment. It helps you maintain the four requirements your kits needs to fruit mushrooms. The plastic allows light in and keeps the humidity contained, the holes allow for passive air exchange, and the saturated perlite maintains the proper humidity levels.
Oyster mushrooms have high oxygen requirements so taking off the lid and fanning out the bin 3-5 times a day is highly recommended, especially as fruit bodies start to develop. The holes in the bin allow for passive air exchange; this keeps the mushrooms from suffocating but the more oxygen you can provide the better.
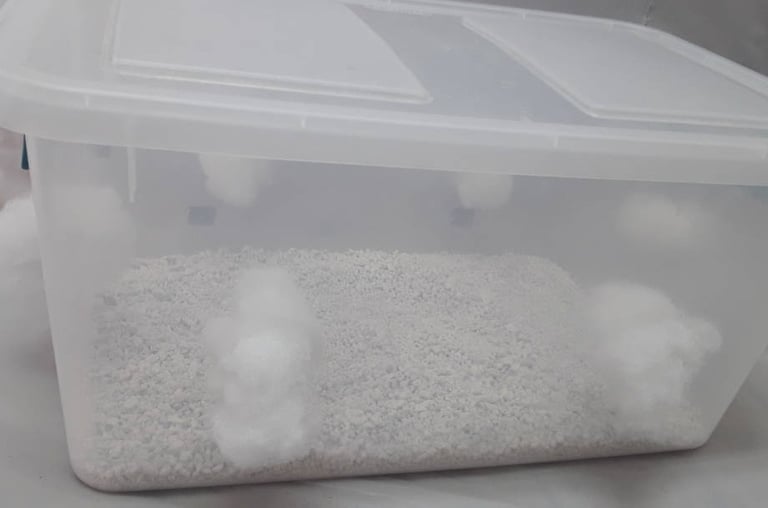
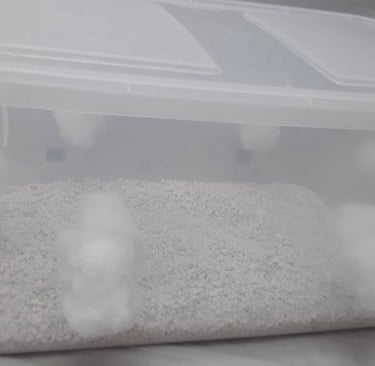
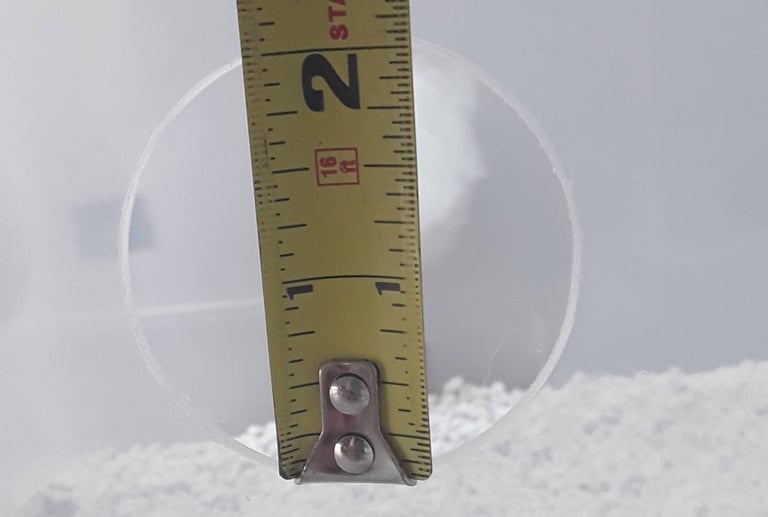
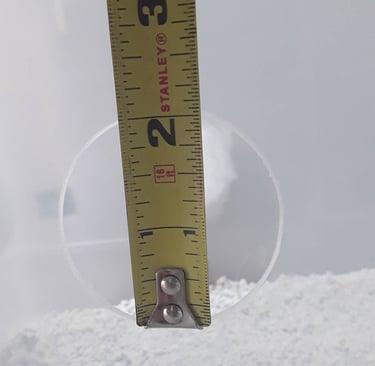
Another way to setup your fruiting container is whats called a monotub. This is another idea from the underground that meets the environmental requirements for mushrooms to fruit. This is a bin with larger holes drilled out and stuffed with polyfil (pillow stuffing), and about 1 in. of saturated perlite at the bottom.
Fruiting your kit
Once you get your fruiting chamber setup, cut open your kit with a clean knife and place it inside. I like to fold the top of the bag underneath and place it on its side. Wherever you cut holes, that’s where your mushroom cluster will grow from. The more holes you cut, the more clusters you will get. You should see mushrooms start to form within a week of cutting it open.
I Grew Some Mushrooms, What’s Next?
If you were able to get your kit to produce mushrooms congratulations! It’s time to brag to everyone about your success. Share your accomplishment with others to show them something they may have never seen before. You’ll most likely get the reply, “what is that?” I personally like this reply as this gives me an opportunity to share a little information about fungi, recipes, cultivation, etc.
So you successfully grew some mushrooms, what now?
Leave it alone
Yes, leave it be. The organism has spent the last month or so gathering nutriments, building cell walls, taking apart wood, going through countless cell divisions, putting all its energy into producing fruit bodies, and dispersing spores to name a few. Sounds like the fungi could use a break, huh?
That’s exactly what happens after a flush of mushrooms. The biomass takes a breather and begins reallocating resources to produce another flush of mushrooms. The time it takes to rest varies and depends on the species of mushroom your are growing. During the rest period, it’s recommended that you leave the kit alone; no misting, no air exchanges, nothing.
If you are growing oyster mushrooms, wait a week or so and you’ll begin to see more fruit bodies begin to form. At that time you can start your regular misting and air exchange schedule. The block will produce another flush of mushrooms, however, this next flush will be smaller than the first. When fruit bodies are forming, large amounts of resources are used to create them. It's the concept of diminishing returns. Resources are used but unless they are replaced, there is a limit to what the output will be.
Sometimes this can be addressed by re-soaking your block in non-chlorinated water for 2-4 hours to replenish the water supply of the biomass. This does help subsequent fruitings but an over saturation can drown the mycelium and could negatively impact yields. It can also increase the probability of contamination but sometimes the reward outweighs the risk. It’s your call.
This can be repeated a couple of times but keep in mind, the mycelium has been working very hard and as it ages, becomes susceptible to pathogens. This is the reality of nature which is why commercial cultivators harvest the first flush of mushrooms and then toss the blocks as they operate based on the demands of the market and cannot afford the risk of contamination disrupting their operations.
This brings me to the next topic, using them in your landscape.
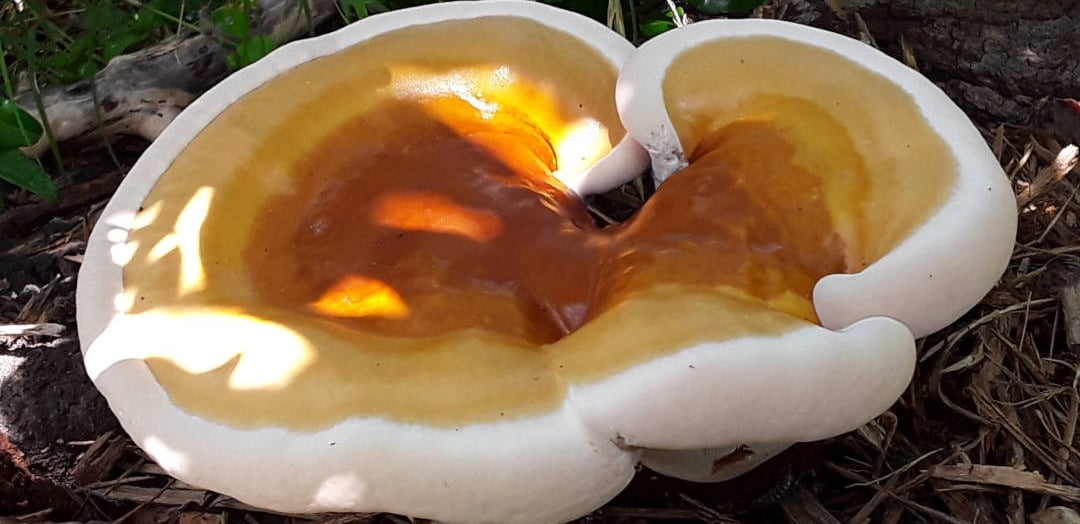
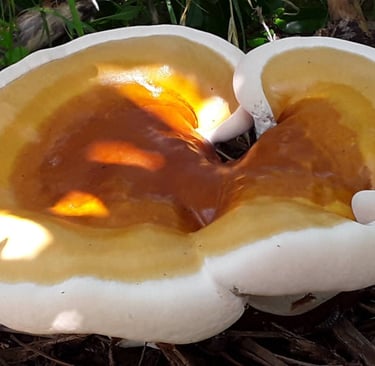
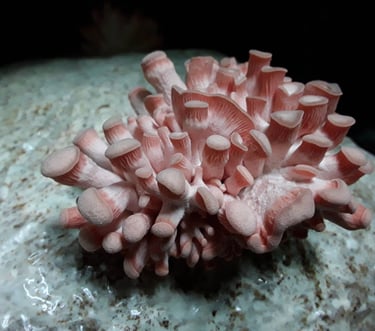
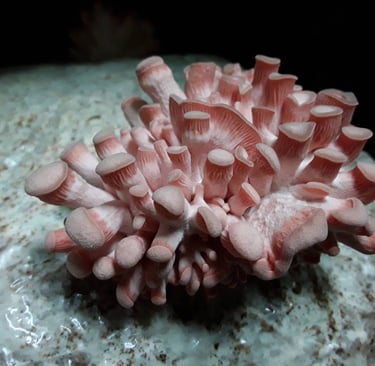
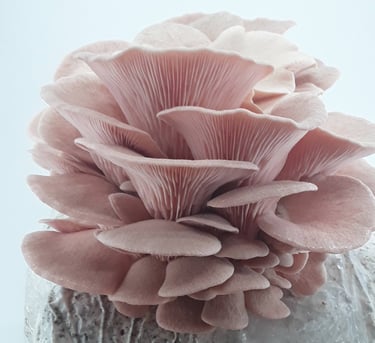
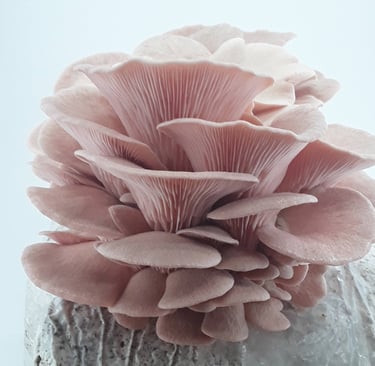
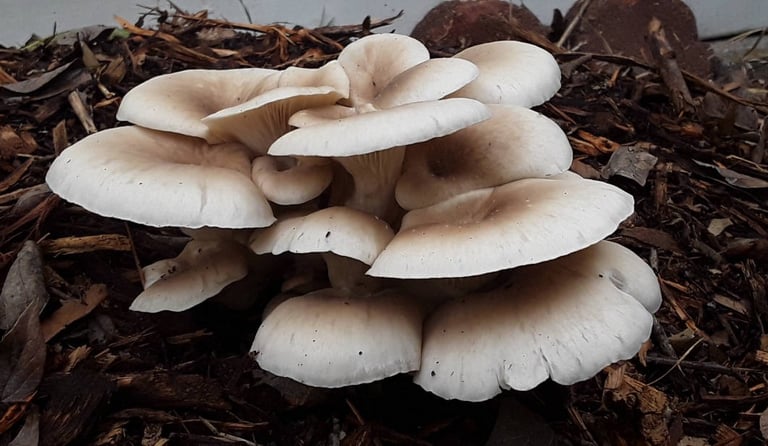
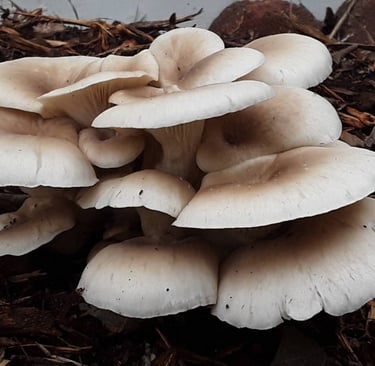
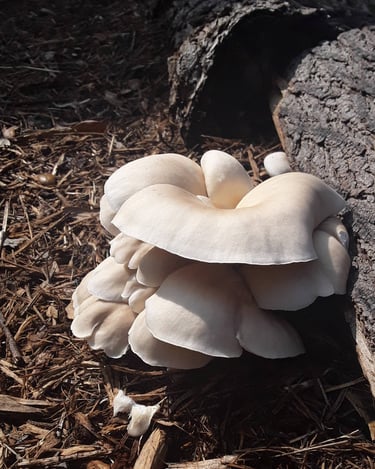
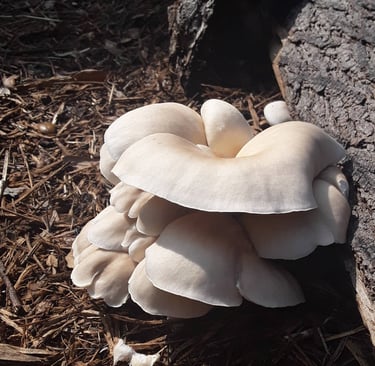
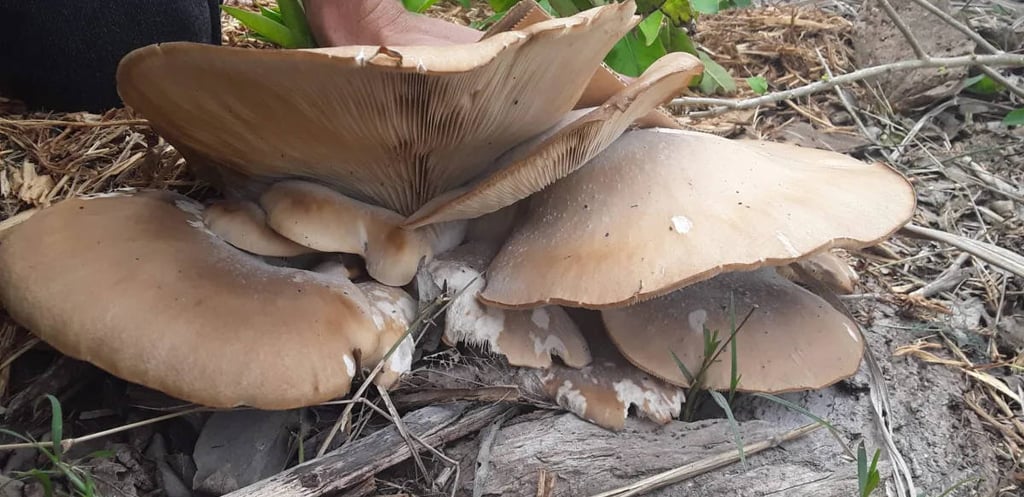
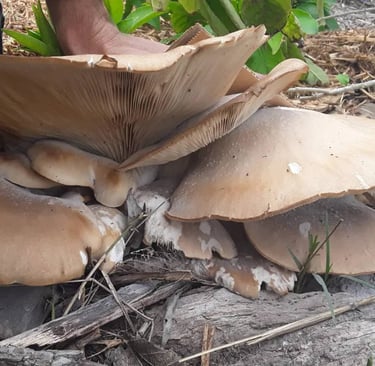
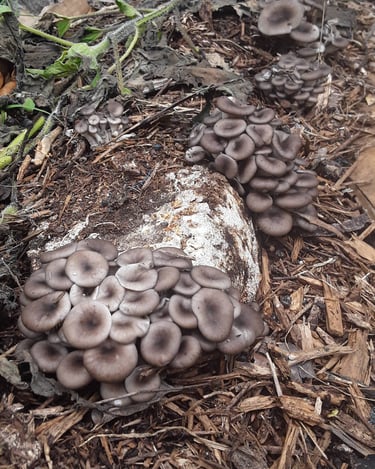
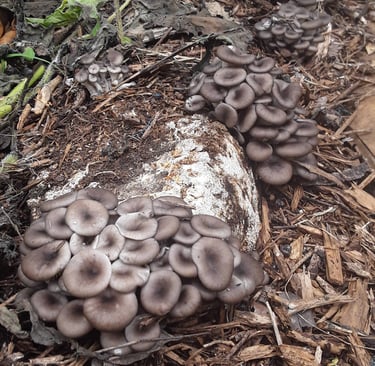
This cluster of elm oysters is pretty big for the second flush. By keeping the patch moist, the mycelium was able to absorb some additional moisture and successfully produce another dense cluster.
Sources
Metzler, S., Metzler, V., & Miller, O. K. (2013). Texas mushrooms: A field guide. Austin: University of Texas Press.
Stamets, P. (2005). Mycelium running: How mushrooms can help save the world. Berkley: Ten Speed Press.
Mycobuddy LLC is not responsible for the misuse of this information and is not liable for damages, losses, or injury resulting from its use.
This Is Just The Beginning
The methods covered here are a few ways that I use mycelium in my garden to help build the soil and hopefully produce some more mushrooms. I share these with you as proof of concept since they are in essence, experimental. I encourage you to explore what fungi can do and see what they are here to teach you and to share your successes with others. Not just cultivation success but any success. This is a sure way to inspire others to set their own goals and go out and achieve them.
If you want to take an even deeper dive into the soil and learn about mycology, check out our books page. These are books written by some of the leading experts in the field of mycology and will definitely help you understand what fungi are all about.
If you are just starting out on your mycological journey, the two books I always recommend are Mycelium Running by Paul Stamets and Organic Mushroom Farming and Mycoremediation by Tradd Cotter. These two texts are packed with information that will blow your mind!
I hope this article has removed some of the barriers that have been keeping you from growing mushrooms. It may seem intimidating on the surface but the more you read about mycology and apply what you learn, the more mushrooms you’ll find growing around you. It is a powerful skill and has the potential to make great change.
It has been a joy sharing this beautiful art and science with you.
Take care and stay curious.


Stay Real,
Louis San Miguel
Disclaimer: This blog post may contain affiliate links. When you make a purchase using these links, we receive a small commission at no extra cost to you. Please read our Disclosure for more info.
Mushroom Grow Kits
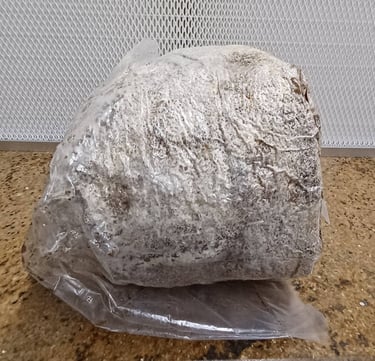
One of the easiest and quickest ways to start growing fresh mushrooms at home is to purchase a ready to fruit mushroom kit. These kits are considered production blocks in the industry due to their high yielding capabilities. The blocks are a mixture of sawdust, water, and nutrient supplementation that is sterilized and inoculated with mushroom tissue.
Once the mushroom tissue (mycelium) has completely consumed the mixture, the block is cut open and environmental conditions are changed. The introduction of light, humidity, oxygen, and drop in temperature causes the organism to shift into the next phase of its life cycle and it starts producing mushrooms.
How to care for your mushrooms
There are 4 things you need to provide for your kit to grow mushrooms. They are:
Fresh oxygen
Ambient light / indirect sunlight
High humidity
Proper temperature (depends on species)
There’s many ways to control these conditions but I’m going to show you an easy setup that you can use multiple times.
These last few steps are the most important because that’s where all the work of the cultivator comes to fruition. All you have to do is give the fungi what it needs and it will reward you with a delicious source of food and medicine.
Your mushroom kit will come with instructions on how to initiate the fruiting process and how to control the environmental conditions. I’ll be covering some basic steps of what it takes to successfully fruit mushrooms of the Pleurotus (oyster) genera.

When it comes to production blocks, they have a lot of energy in them which is why they produce large flushes of mushrooms. Once you get your first flush, it’s not over yet. That block still has more to offer and I’ll share a couple of things you can do to get the most out of your mushroom kit.
Using Your “Spent Block”
When a production block or kit has produced a crop of mushrooms, it is considered spent. However, I don’t believe there is such a thing as a spent block.
Remember this is living organism. Even though it has produced mushrooms, the biomass itself is very much alive, with the exception of the outer layer of the block. With this in mind, extending your “mycelial mileage”, a concept I learned from Paul Stamets, is an idea that you can continually feed mycelium and keep it growing indefinitely.
I wouldn't say you can grow it forever but you can extend its lifespan and ensure its longevity by providing it with what it needs.
For the most part, production blocks have quite a bit of food in them. Even after a first flush, the block itself can continue to produce for many weeks on its own. When you introduce the block to another food source, it is POSSIBLE that it will start to use that new food source and expand its network. Introducing your block to a new food source doesn't guarantee that it will survive but it is a way to extend its production.
Gardening With Fungi
I’m going to share some of the ways that I have used spent mushroom blocks in my garden and landscape. Again, there is no guarantee that you will get more fruitings from them but either way, you are helping the soil ecology.
The mycelial tissue is composed of minerals and elements, which will be released in to the soil as other microbes come to feast on the highly nutritious material. Soil microbes like earthworms, will process this material further and leave their droppings in the soil which is covered in enzymes that can bind soil aggregates and contribute to the porosity of the soil. There are such intricate and complex interactions in the soil that I cannot get into them here, but just know that you are feeding the soil and that will it contribute to overall health and resilience of your plants in the garden.
Experimental Installations
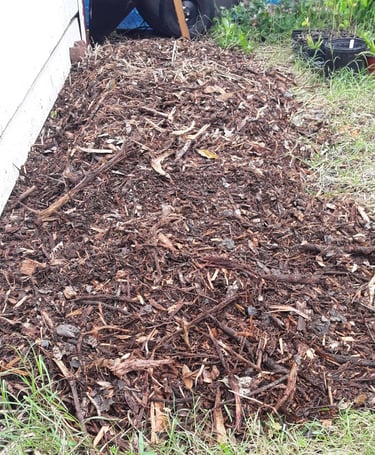
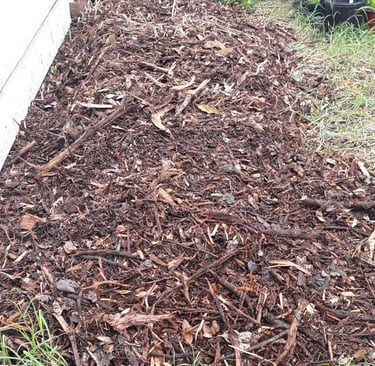
In this small area I threw down a layer of untreated wood chips, placed some spent blocks on top, and covered with more wood chips. I watered them in a bit and left the alone for a few weeks. Nothing fancy or technical, just put the blocks on the ground and covered them. There were only 3 spots that fruited but either way, soil was being built.
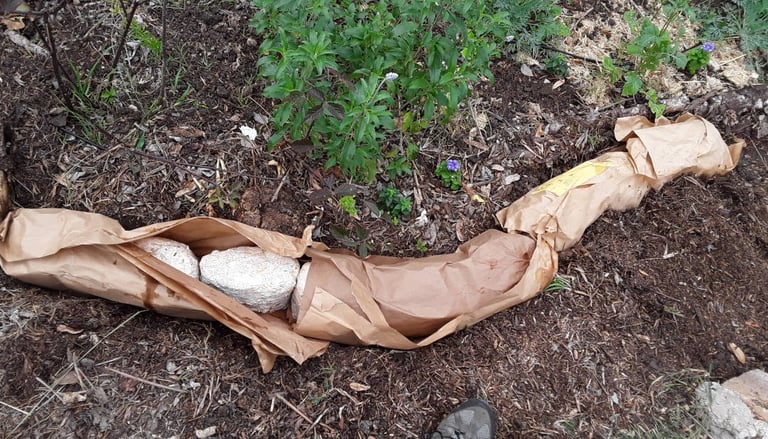
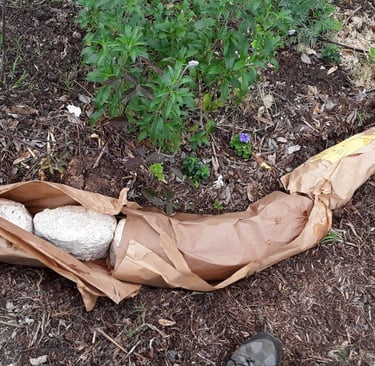
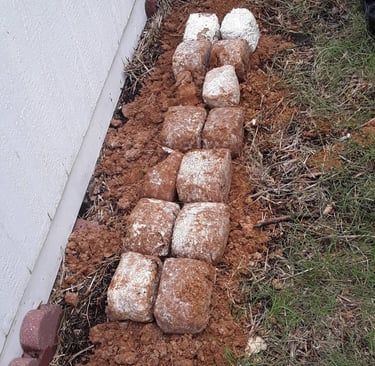
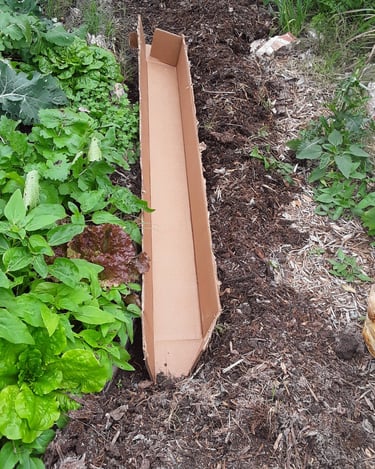
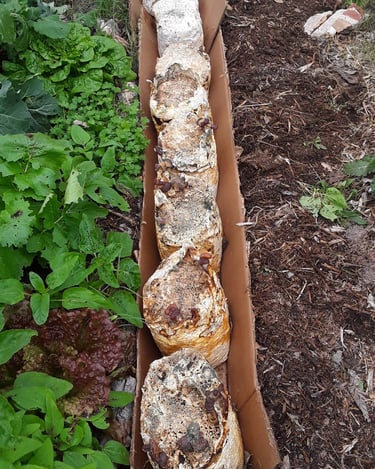
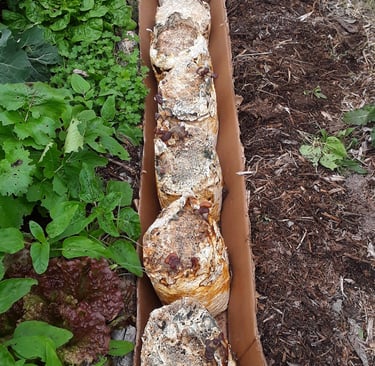
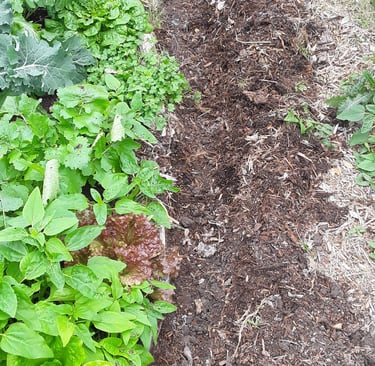
In this area of my garden, I used a number of blocks to line the border of my garden bed. To do this, I dug out a trench, layed down some paper from a grain bag, placed my blocks inside, and folded the paper over the top of the blocks. I then topped it off with some garden trimmings to help with moisture retention.
You can use any type of paper material as it is made of wood fibers, a prime food source for mycelium. Remember, think like a mushroom.
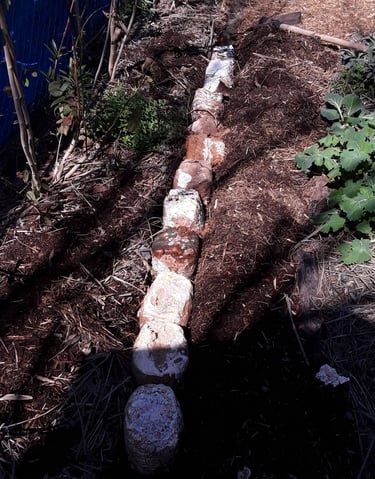
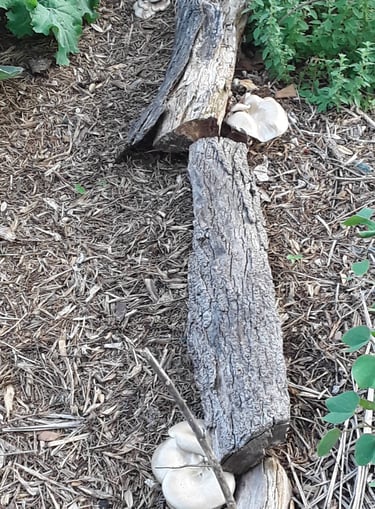
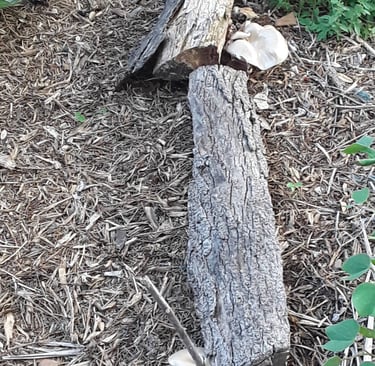
In this installation, I dug out a trench, placed the blocks inside and covered with the same soil. I didn’t use any paper or cardboard to line the trench or cover the blocks, just soil. After covering them with soil, I placed some pieces of split wood on top of the covered blocks.
I have grown to like using wood as a garden bed border. In this case, it will help keep the blocks insulated from the sun, preventing them from drying out. It will also provide a nice micro climate at the interface between the soil and the bottom of the wood. And, it is possible that the mycelium can leap off onto the wood and use that as a new food source.
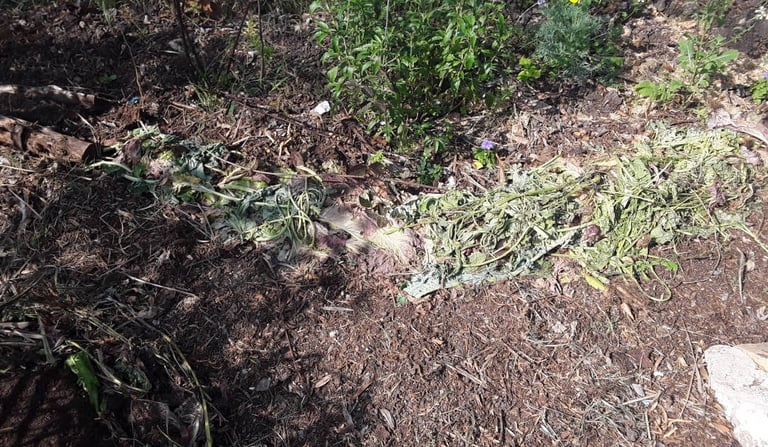
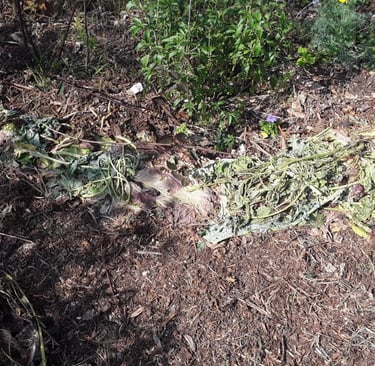
As you can see, some of them were successful at fruiting again. The other blocks became food for the soil and have continued to help my garden flourish. I decided to leave a few fruit bodies so they could release their spores into the area.
This cluster I didn't notice until it had reached full maturity and released its spores. I decided to leave it and let nature run its course.
These oysters became food for the surrounding microbes and insects and eventually degraded back into the soil, releasing all of the nutrients that were locked up in the fungal tissue.
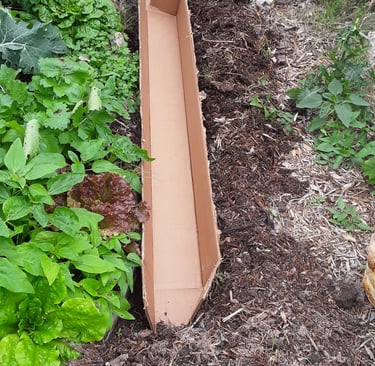
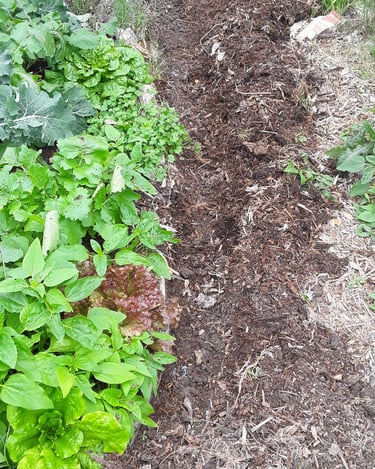
This trench I lined with cardboard, placed blocks inside, and covered with the mulch I dug out. When the spring rains arrived, the blue oysters were the first to produce fruitings. Even though the blue oyster is a cooler weather species, it still produced mushrooms.


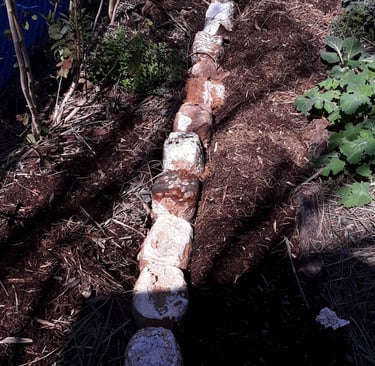
This trench I lined with cardboard, placed blocks inside, and covered with the mulch I dug out. When the spring rains arrived, the blue oysters were the first to produce fruitings. Even though the blue oyster is a cooler weather species, it still produced mushrooms.
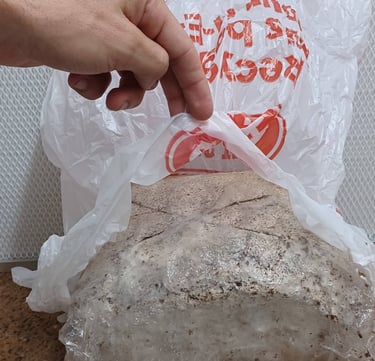
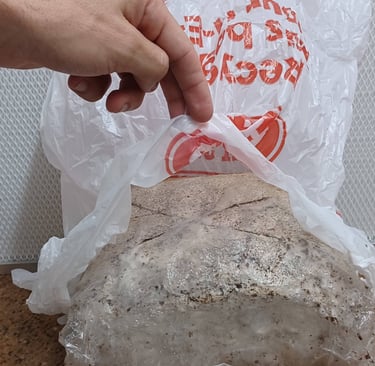
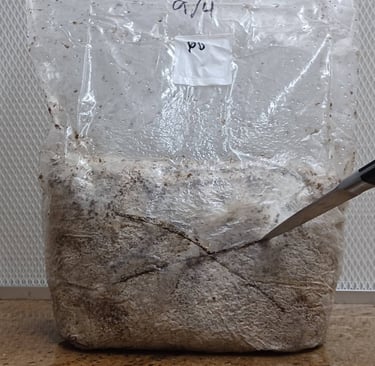
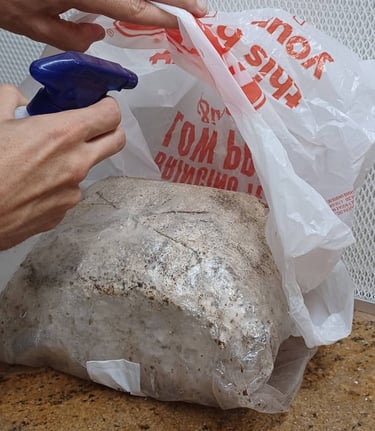
Step 1
Using a clean sharp knife, cut a 3 - 4 inch "X" on the side of your kit. This is where your mushrooms will emerge. **Note: The more holes you cut, the more clusters that will grow.
Fold the top part of the bag under the kit with cut side facing upward
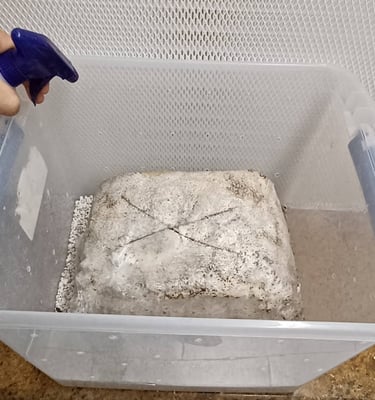
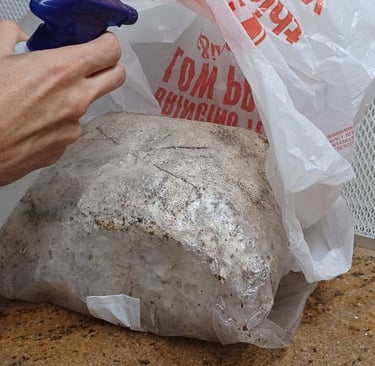
Step 2
Cover the kit with a perforated bag or clear container to create a micro greenhouse environment. Make sure to have at least 2-3 inches of open space above the kit.
[[Recommended]] The second image is a clear bin has ¼ inch holes drilled all around for passive air exchange and saturated perlite at the bottom to control humidity. (Shotgun Fruiting Chamber)
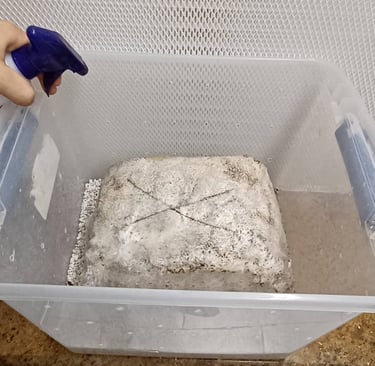
Step 3
With a spray bottle mist inside of your container 4-5 times a day. The goal is to maintain high humidity levels around the kit.
Spraying the surfaces of your container is ideal.Avoid misting the cut area; you will damage the developing fruit bodies.
Step 4
Within 7-10 days you should begin to see small mushrooms where you cut open the kit.
The best time to harvest is just before the caps start to flatten out.
To harvest, grab the cluster at the base and twist off.